
Course Overview & Layout
Deer Park Golf Club
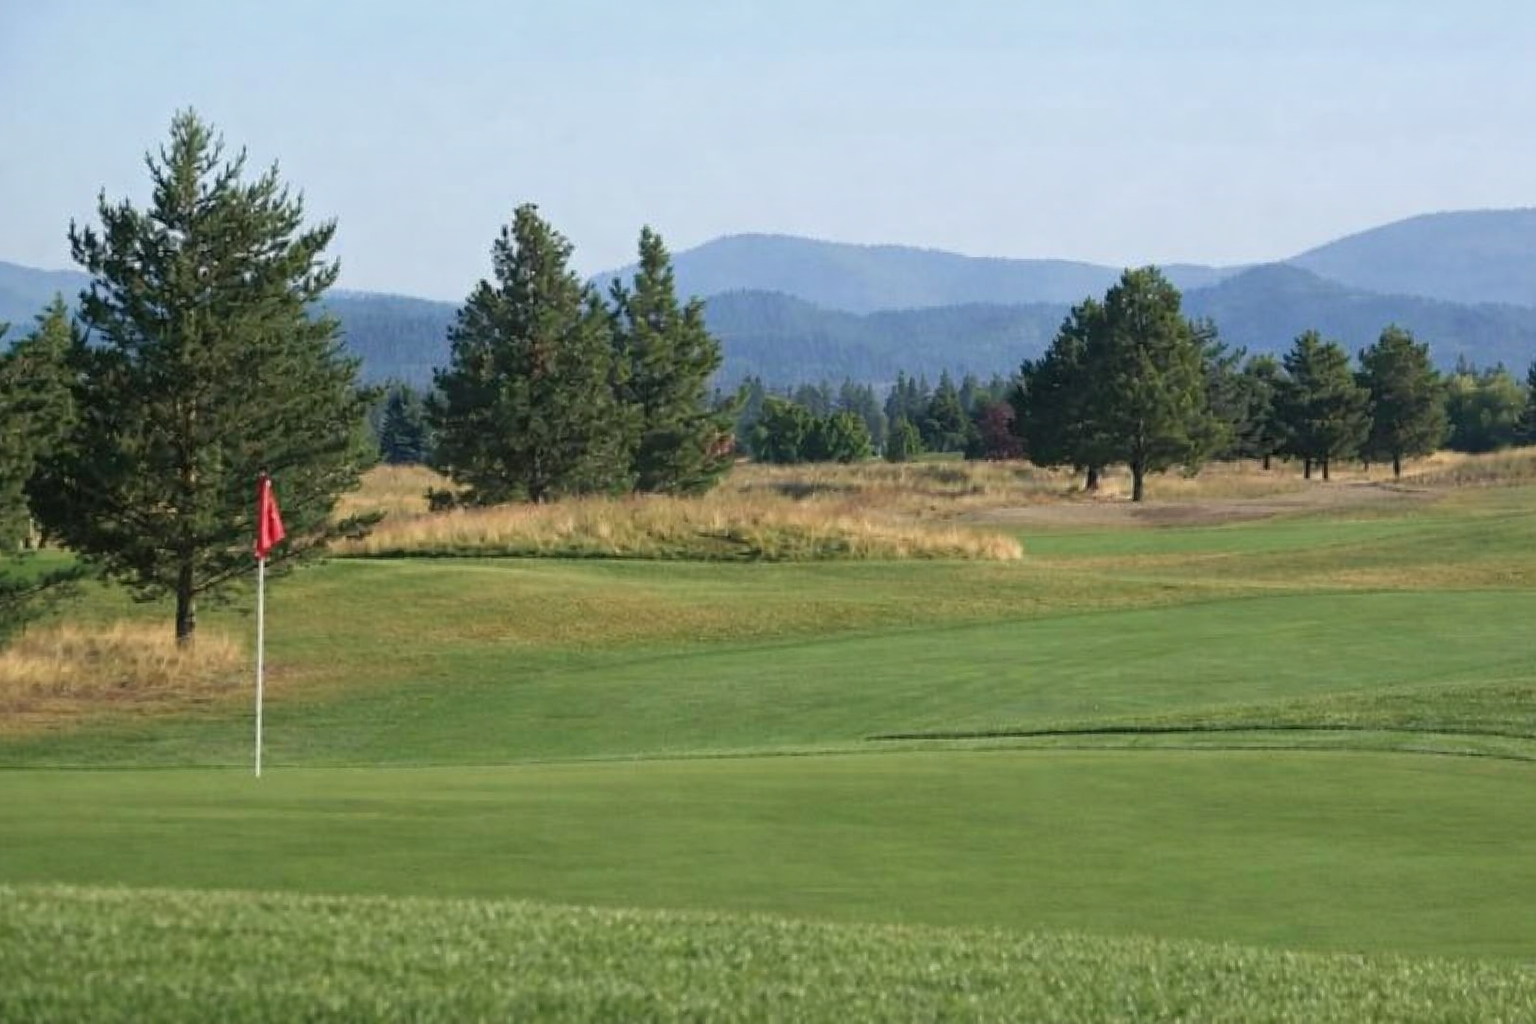
Links-inspired golf with generous fairways, strategic approaches, and a fun Northwest wind test.
Deer Park Golf Club is a links-inspired public course that blends a relaxed atmosphere with a thoughtful, rewarding test of golf. Set against scenic mountain views and Northwest terrain, the course is welcoming for newer players while still challenging those who want to score.
Wide fairways and open landing areas make the course approachable off the tee, while thick rough, fescue, and strategically placed ponds introduce decision-making as the round progresses. Greens are well-kept and demand solid distance control—especially when the Northwest wind shows up.
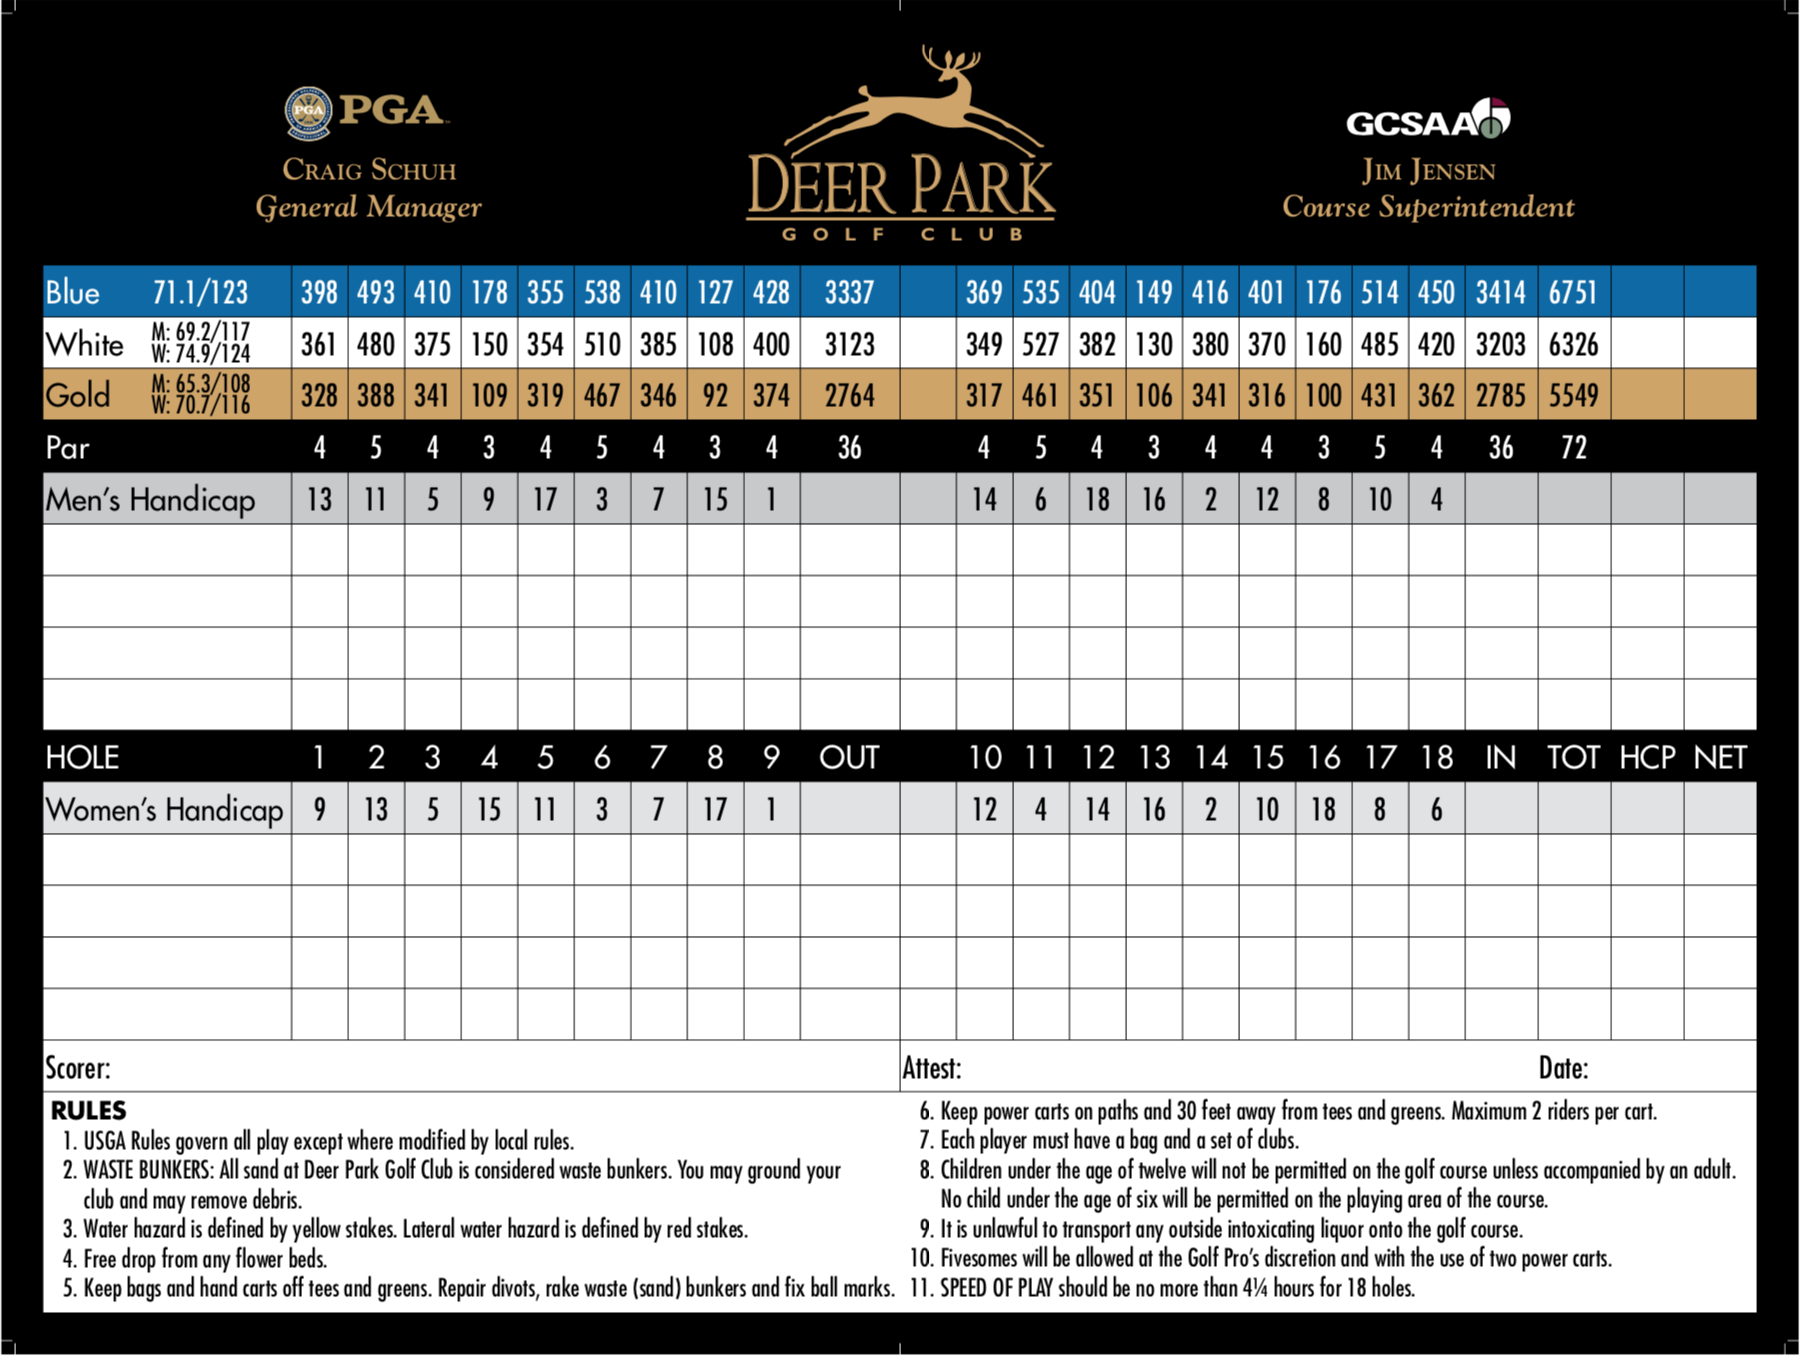
With yardages ranging from 5,549 to 6,751 yards across three sets of tees, Deer Park offers flexible setups for casual play, weekly games, or tournament preparation.
Who It’s Best For
How the Course Plays
- Playable off the tee — generous corridors, but angles still matter.
- Approach shots decide scores — missed targets add strokes quickly.
- Greens reward pace — uphill putts and distance control matter.
- Wind is part of the round — especially on exposed holes.
Course at a Glance
- Holes: 18
- Par: 72
- Yardage: 5,549 – 6,751 yards
- Style: Open, links-style layout
- Practice: Driving range, putting & short game
- Walking: Yes (carts available)
- Conditions: Wind often a factor
- Location: Deer Park, Washington
Scorecard & Course Map

Course Conditions & Playing Tips
- Tee markers move regularly — yardages vary daily
- Wind frequently impacts club selection
- Waste bunkers are played as hazards under local rules
- Greens reward accurate approach shots
- Please repair ball marks and replace divots
- Target pace of play: approximately 4 hours, 15 minutes
- Expect firmer summer conditions — rollout matters and the ground game is in play
Hole-by-Hole Overview
Hole 1 — 398 Yard Par 4
The opening hole features a sharp dogleg left guarded by trees, out-of-bounds, and a large waste bunker. The driving range runs along the right side, placing a premium on accuracy off the tee. The approach plays into a large, two-tiered green that slopes from back to front.
Strategy Tip: A controlled tee shot down the fairway leaves a mid-iron approach, while longer hitters can challenge the corner to set up a shorter second shot.
Hole 2 — 493 Yard Par 5
This par 5 plays slightly uphill and demands solid ball striking from tee to green. Trees frame both sides of the fairway, while subtle movement in the landing area can influence rollout. The green is well-protected and rewards a controlled approach shot.
Strategy Tip: Favor position off the tee to set up a comfortable second shot, as accuracy into the green is more important than reaching in two.
Hole 3 — 410 Yard Par 4
While straightaway in appearance, this hole plays more challenging than it looks. Trouble lurks down the left side, including trees, fescue, and a waste bunker that can come into play off the tee, with out-of-bounds extending beyond. The green is well-guarded and demands a precise approach.
Strategy Tip: A tee shot favoring the right-center of the fairway provides the best angle into the green and avoids the trouble lining the left side.
Hole 4 — 178 Yard Par 3
The first par 3 on the course plays to a large, sloping green and can vary significantly depending on tee and pin placement. A pond guards the left side from tee to green, while a creek over the back-left punishes shots that carry too far. Wind often plays a factor, making club selection critical.
Strategy Tip: Favor the center or right side of the green, especially when the pin is tucked left, and commit to the yardage in windy conditions.
Hole 5 — 355 Yard Par 4
This shorter par 4 rewards accuracy over distance. Trees and rough frame the fairway, while the approach plays into a modestly sized green that can be difficult to hold from the wrong angle.
Strategy Tip: Position off the tee is key—favor a comfortable yardage rather than trying to overpower the hole.
Hole 6 — 538 Yard Par 5
This demanding par 5 often plays into the prevailing wind and typically requires three well-executed shots. Trouble lines both sides of the fairway, with fescue, waste bunkers, and out-of-bounds along the left, and a deep waste bunker guarded by trees on the right. A well-positioned drive opens up a clean second shot toward one of the smaller, flatter greens on the course.
Strategy Tip: A controlled tee shot down the center of the fairway sets up the best scoring opportunity, as accuracy is rewarded more than raw distance.
Hole 7 — 410 Yard Par 4
A strong tee shot favoring the left-center of the fairway provides the best angle of approach. Thick rough borders both sides, and drives pushed too far left risk finding a small pond short of the green. The long, multi-tiered green features significant slope and is guarded by a grass bunker on the left and a water hazard long.
Strategy Tip: Position off the tee is critical—set up a controlled approach that stays below the hole on this heavily contoured green.
Hole 8 — 127 Yard Par 3
This short par 3 requires a precise tee shot over water to a sharply sloped, multi-tiered green. A pond guards much of the right side, and shots that miss their line can easily funnel toward the hazard. Depth perception from the tee can be deceptive.
Strategy Tip: Aim for the correct tier rather than attacking the flag, as putting from the wrong level can be very challenging.
Hole 9 — 428 Yard Par 4
The toughest hole on the front nine, this long par 4 often plays directly into the prevailing wind. Out-of-bounds and a large waste bunker line the left side, while thick rough guards the right. The approach frequently plays longer than the yardage into a massive, sloping green.
Strategy Tip: Favor the fairway off the tee and plan for a longer approach, as par is an excellent score under most conditions.
Hole 10 — 369 Yard Par 4
The back nine opens with a demanding par 4 that rewards smart course management. Trouble lines both sides of the fairway, with water and a large tree guarding the right, and out-of-bounds and waste bunkers along the left. A well-placed tee shot sets up an approach into a very wide green.
Strategy Tip: A conservative drive down the middle leaves a mid-iron approach, while an aggressive line off the tee can create a shorter wedge and a realistic birdie opportunity.
Hole 11 — 535 Yard Par 5
The longest hole on the back nine challenges players to execute three solid shots, though longer hitters may reach in two. Out-of-bounds and waste bunkers line the entire left side, while approaches that miss left can find fescue and sand. The large green slopes from back to front and away from the center.
Strategy Tip: Favor the right side off the tee and play to your preferred yardage, as the green’s slope makes positioning critical.
Hole 12 — 404 Yard Par 4
The easiest-rated hole on the course plays relatively straightforward, with most trouble concentrated along the left side. The large green provides ample room on approach, though pin placement can quickly turn birdie looks into challenging two-putts.
Strategy Tip: Favor the right side off the tee and focus on positioning your approach below the hole for the best scoring chance.
Hole 13 — 149 Yard Par 3
This scenic par 3 is the final hole requiring a tee shot over water. While the green is generous, shots that come up short will find the hazard. Misses to either side leave challenging recoveries.
Strategy Tip: Take enough club to comfortably clear the water and aim for the center of the green.
Hole 14 — 416 Yard Par 4
The signature hole is a demanding dogleg-left par 4 featuring a creek running the entire left side before crossing near the corner. Aggressive tee shots bring out-of-bounds and tree trouble into play, while drives pushed too far can find water right. A well-positioned drive sets up an approach into a severely undulated green guarded by a pond.
Strategy Tip: Favor placement over distance off the tee, as par is an excellent score on this challenging hole.
Hole 15 — 401 Yard Par 4
This par 4 appears straightforward but can quickly bring trouble into play. A long waste bunker, fescue, and out-of-bounds guard the left side, while thick rough awaits shots right. The approach frequently plays longer than the yardage.
Strategy Tip: Favor the right-center of the fairway and account for the extra yardage on approach.
Hole 16 — 176 Yard Par 3
The only par 3 without a forced carry over water, this hole still plays demanding, often into the wind. A solid mid- to long-iron is required to reach the large green, with a wide waste bunker and dry creek guarding the front.
Strategy Tip: Take enough club to clear the front hazards and favor the center of the green.
Hole 17 — 514 Yard Par 5
A classic risk-reward par 5 and a favorite among many players. Drives pushed too far right can be blocked by trees, while misses left bring waste bunkers and out-of-bounds into play. A tempting second shot over water contrasts with a safer layup left. The green slopes sharply from back to front.
Strategy Tip: Decide on your plan from the tee—aggression can be rewarded, but laying up often leads to smarter scoring.
Hole 18 — 450 Yard Par 4
The closing hole is the longest par 4 and provides a demanding finish. Out-of-bounds and a final waste bunker guard the left side, with thick rough lining the right. The approach plays into a multi-tiered green with pronounced slopes.
Strategy Tip: Favor accuracy off the tee and focus on leaving an uphill putt to finish strong.